How to Plan an ADU Floor Plan (For Maximum Function)
Blueprint square footage numbers rarely tell the whole story. Many homeowners focus on raw dimensions, missing crucial details about how people move through a compact living space. A thoughtful layout avoids awkward corners and ensures every inch of the new dwelling works hard. The guide shows how to plan an ADU floor plan that functions for daily life. The guide breaks down common mistakes and highlights clever solutions for kitchenettes, sleeping nooks, and compact bathrooms. Each design decision creates a ripple effect, impacting flow and perceived spaciousness within a small footprint. The ADU’s concrete slab supports the structure, but smart design supports the lifestyle.
1. Efficient Studio Layout Blueprint

The clear labeling of the floor plan as an “Efficient Studio Layout” immediately communicates the design’s purpose. The direct title helps one understand the specific intent behind the room arrangements. White paper rolls and small wooden house models suggest the hands-on process of planning the ADU floor plan. Consider naming your blueprint for its primary function.
2. Compact One-Bedroom Design
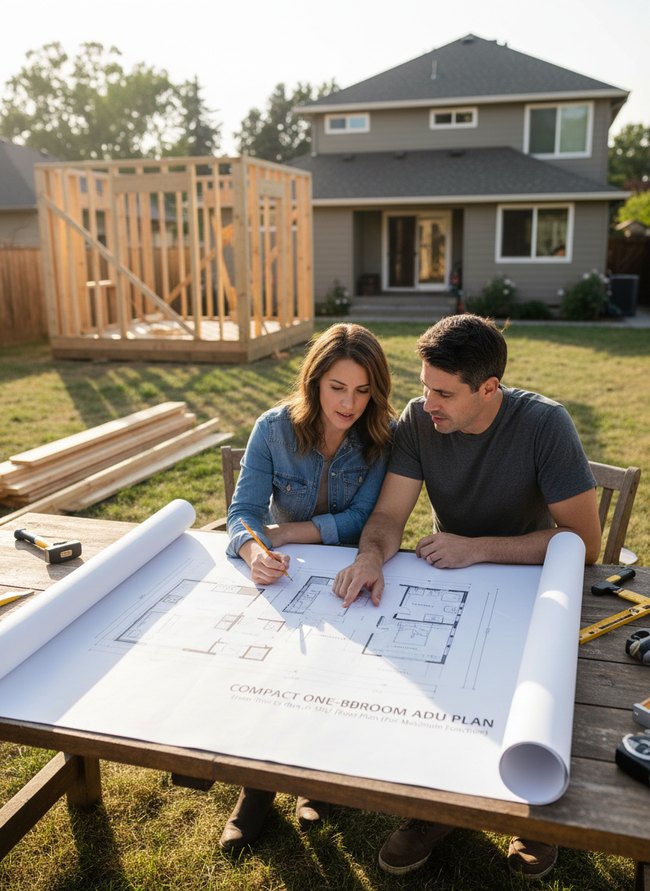
The large paper blueprint displays a Compact One-Bedroom ADU Plan, showing a smart layout for a small living space. The design prioritizes function, fitting a bedroom, bathroom, and open living area into a tight footprint. The floor plan demonstrates how to maximize square footage by placing common areas adjacent to private rooms.
3. Lofted Living Space Scheme
The large white floor plan unfurls across a rustic wooden drafting table, showing a two-story layout with a distinct lofted living space. The layout maximizes vertical volume, creating an open airy feel in a compact footprint. A clear separation between the ground-floor living areas and the upper-level private spaces is visible. A lofted living space scheme provides visual interest and functional zoning within a smaller dwelling.
4. Open Concept ADU Sketch
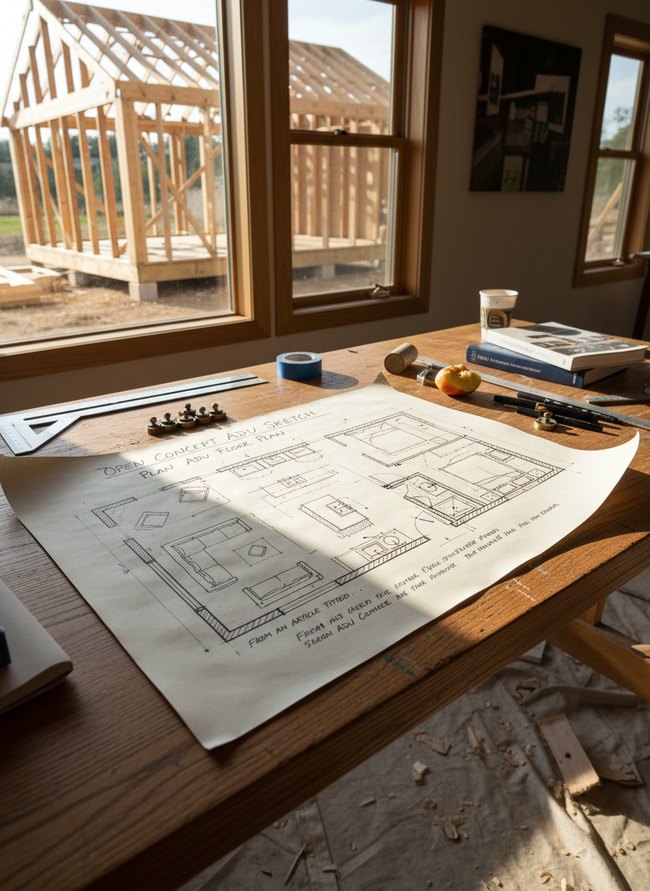
An open-concept layout maximizes usable space in a small footprint, offering versatile living areas. The arrangement combines kitchen, dining, and living zones into one large room, making a smaller ADU feel much larger. Homeowners can define distinct functional areas within the open space using furniture placement, like the L-shaped sofa and area rug shown. The main move to steal is designing an open-concept plan ADU floor plan.
5. Multifunctional Flex Room Plan
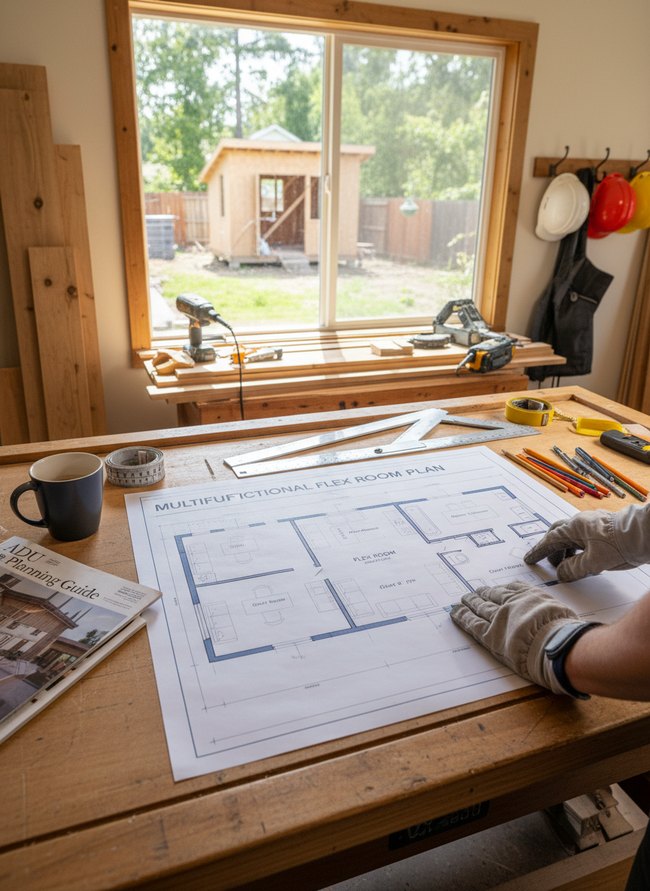
The large blue-lined blueprint shows distinct zones within a single open space, creating a flexible layout for any ADU floor plan. The approach allows one room to serve many purposes, like a home office or a guest bedroom. A magazine with a similar architectural drawing reinforces the design theme. Consider dividing larger areas into smaller, adaptable sections.
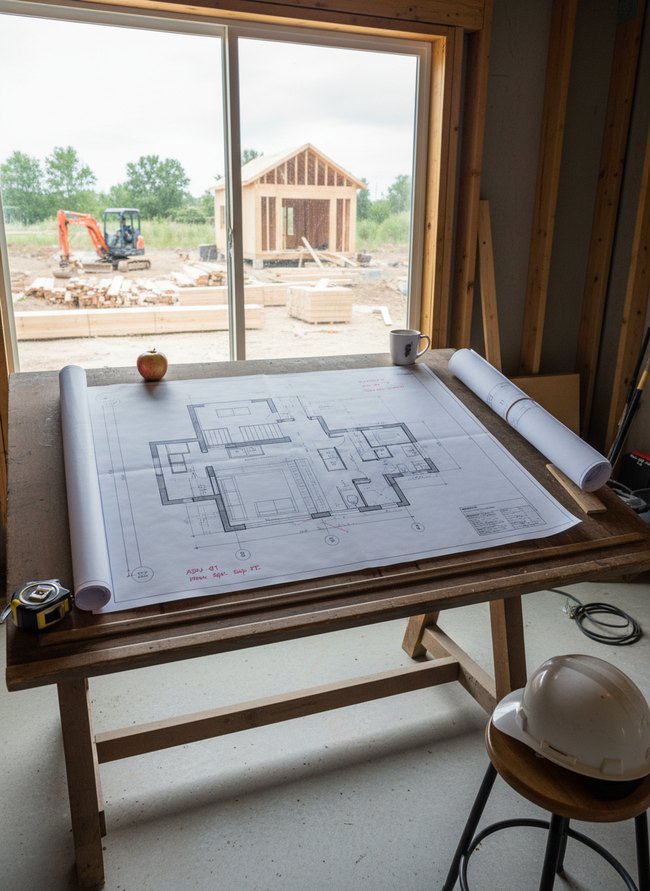
6. Accessible Ground-Level ADU

The expansive wooden work table clearly displays the large white ADU floor plan, making every detail visible for review. The careful presentation ensures all parties can easily discuss and modify the accessory dwelling unit layout. Open magazines also provide visual references, offering practical inspiration for your own plan ADU floor plan project. A large, central plan facilitates clear communication.
7. Stackable Two-Story Drawing

The large white blueprint shows a clear layout for a stackable two-story ADU, allowing for simple visualization of room placement. The detailed drawing helps you understand how different spaces connect, especially useful for a multi-level structure. A black computer screen displays a 3D rendering of the modern house, giving you a realistic view of the finished exterior. A comprehensive blueprint plans an ADU floor plan effectively.
8. Linear Kitchenette Integration
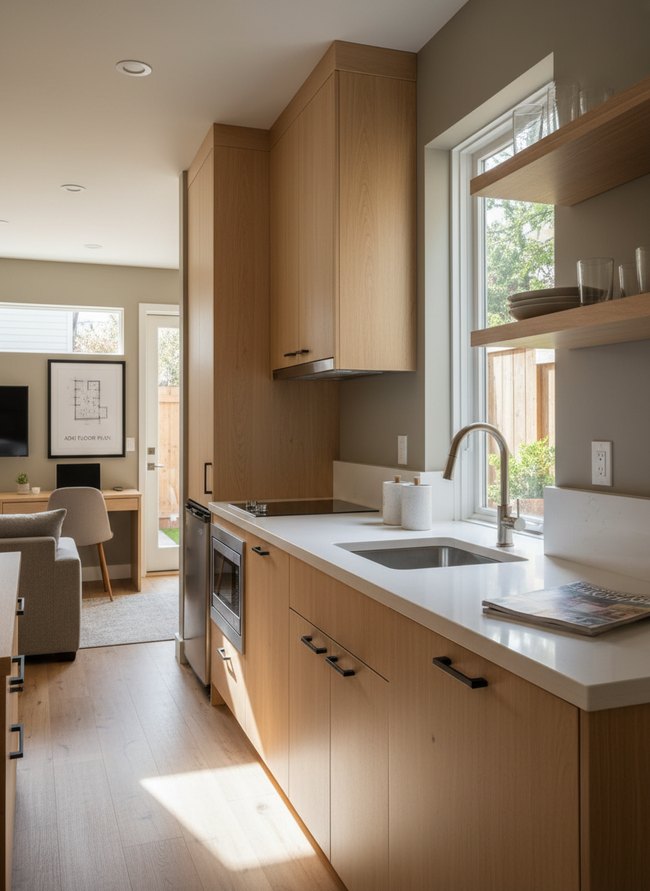
The long countertop of this linear kitchenette integrates appliances seamlessly, creating a clean, unbroken work surface. Light oak cabinetry and flat white walls keep the small space feeling open and airy. A single stainless steel faucet and small sink basin provide basic utility without dominating the counter. Continuous counter space adds value to any ADU floor plan.
9. Private Entryway Diagram
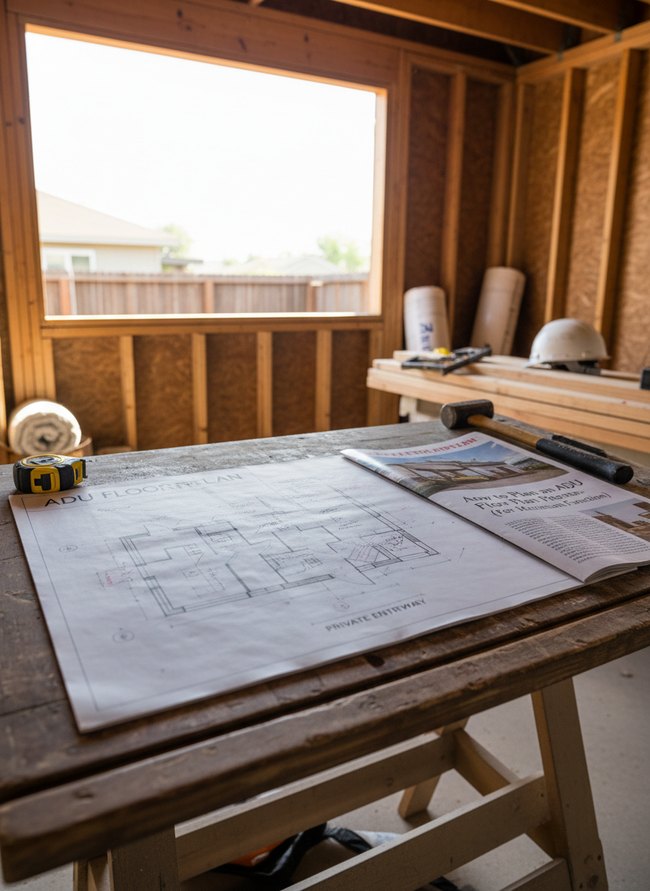
A large blueprint on a wooden workbench clearly labels a “PRIVATE ENTRYWAY” on its ADU floor plan. The specific layout provides a distinct entrance, making the accessory dwelling unit feel separate from the main residence. A yellow measuring tape and a black hammer rest on the rustic wooden surface. Prioritize a distinct entry point for your ADU.
10. Maximize Storage Footprint
The floor plan drawing divides the space into clear, functional zones, maximizing every square foot for an accessory dwelling unit. The design includes a distinct living area, a compact kitchen, and a separate bedroom, showing how to create a complete home in a small footprint. Window and door placement brings in light and offers easy access. Zoning a small home clearly offers many benefits.
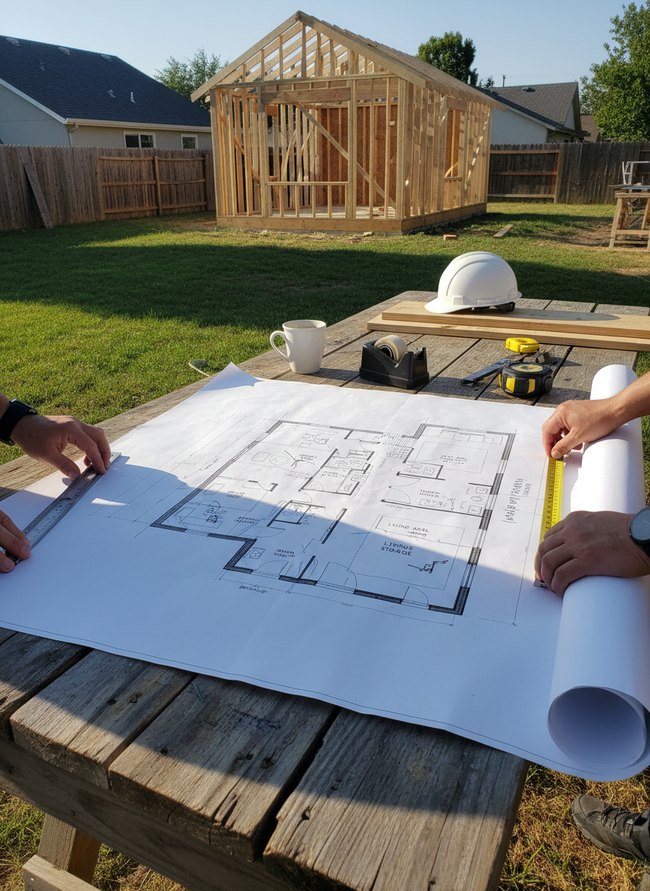
11. Outdoor Connection Flowchart

A large paper blueprint laid flat on the weathered wooden picnic table shows a clear, detailed ADU floor plan. The layout places the new accessory dwelling unit on a poured concrete pad directly behind the main house, connecting the two structures visually. Two white ceramic mugs and a gray river stone sit on the table, suggesting a working design meeting. Consider laying out your ADU plans in the physical space they will occupy.
12. Shared Backyard Access Plan

A cork bulletin board displays a “Shared Backyard Access Plan” prominently, allowing for easy review and discussion among team members. Direct visual access helps everyone understand the ADU floor plan details. A small architectural model sits on a light wooden base, showing the physical layout. Placing the floor plan where everyone can see it provides clarity.
Spatial Compression in Small-Footprint ADUs: Optimizing Verticality and Multi-Functional Zones for Enhanced Perceived Volume
An ADU floor plan benefits immensely from vertical space. A lofted sleeping area, accessible by a narrow wooden ladder, frees up valuable floor space below. Many small homes often forget this simple truth. Your compact living area expands greatly with clever design choices. Tall, honey-toned pine cabinets, reaching the nine-foot ceiling, offer abundant storage for household goods. A well-placed window bench, with deep storage drawers underneath, serves as both seating and additional storage. This multi-functional approach prevents clutter from accumulating in a confined footprint. A folding butcher block island, mounted on a charcoal gray wall, provides extra counter space only when needed. Ignoring the upward dimension limits your functional areas. Thoughtful integration of these elements ensures every square inch of your accessory dwelling unit works hard.
The Biometric Imperative of Entryway Flow: Analyzing User Trajectory and Transitional Thresholds in ADU Design
Your ADU’s entryway must manage human movement with deliberate intent. A narrow, three-foot oak door opening directly into a compact kitchen violates this principle. Consider the trajectory of a person carrying a week’s groceries. They need clear, unobstructed passage past the honey-toned wood threshold. A small, recessed landing, perhaps a three-foot by three-foot square of slate tile, offers a better solution. This small space allows a moment for personal adjustment before entering the main living area. A direct kitchen entry forces an immediate choice between setting down bags or navigating tight turns. The entry sequence should feel natural, like a calm breath before the next activity. A smooth transition reduces friction in your daily routine. Ensure the first steps into your ADU floor plan guide you effortlessly forward.
Which Idea Will You Try First?
That’s 12 different takes on plan adu floor plan. The best ideas above are usually the smallest moves — one material, one layout shift, one piece of furniture in the right place. Pick whichever room feels closest to your space and start there before tackling the rest.
Found an idea worth keeping? Save this post to your Pinterest board so it’s waiting for you when you’re ready to start your own project.