How to Run Electricity to a Detached ADU
Wiring a separate backyard building always brings challenges. A solid plan will save plenty of frustration and unexpected costs. Many homeowners install a few outlets in a new structure, then wonder why the mini-fridge trips a breaker when a power tool starts. Connecting ADU electricity safely and effectively means understanding core principles. Homeowners will need to consider trench depth, wire gauge, and proper grounding for the new structure. The overview shares straightforward advice about getting power flowing correctly.
1. Underground Conduit Installation
A long, gray PVC conduit snakes through a narrow dirt trench, ready for ADU electricity. Red electrical wires sit coiled at the trench’s end, waiting for installation into the weatherproof gray electrical panel box. Always dig the trench deep enough to meet local building codes for safe underground conduit installation.
2. Overhead Line Connection
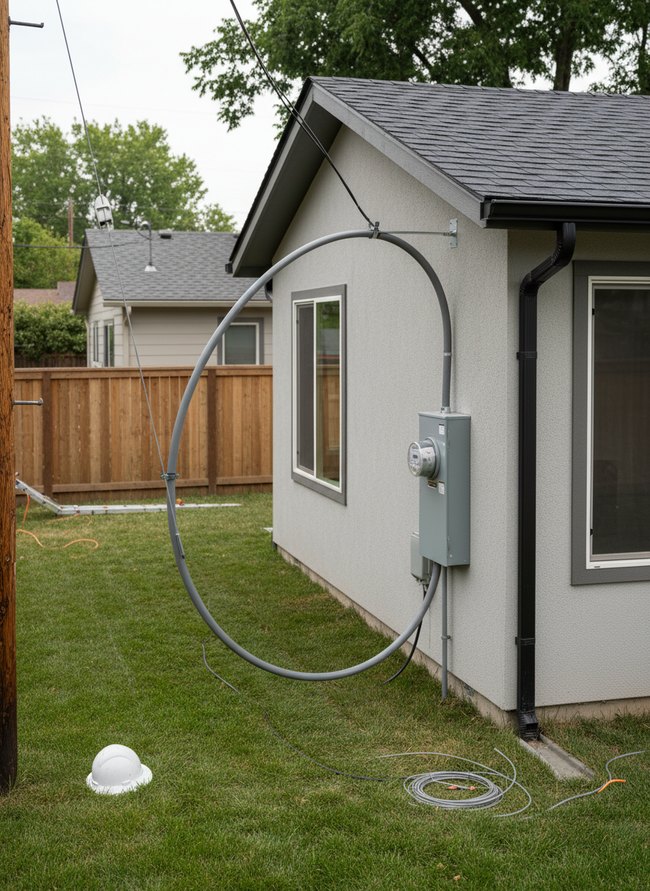
A gray electrical conduit sweeps from a wooden utility pole toward the light gray stucco wall of a small backyard building. The overhead line connection brings power from the street to your accessory dwelling unit. Always hire a licensed electrician for ADU electricity work.
3. Main Panel Upgrade

A licensed electrician carefully works on a gray metal electrical panel attached to a dark brown paneled wall. The setup shows how a main panel upgrade connects ADU electricity to your home. Always hire a trained professional for any electrical work.
4. Subpanel Breaker Layout
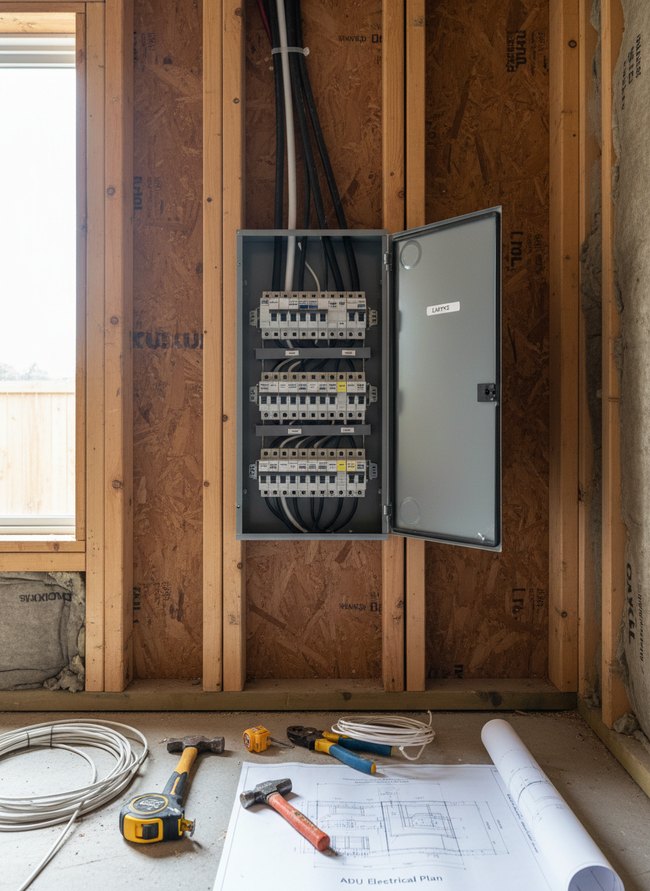
A gray metal electrical panel with its door open shows rows of white plastic circuit breakers. Wiring for the ADU electricity runs neatly into the top of the box. The panel should always have clearly labeled breakers for safety.
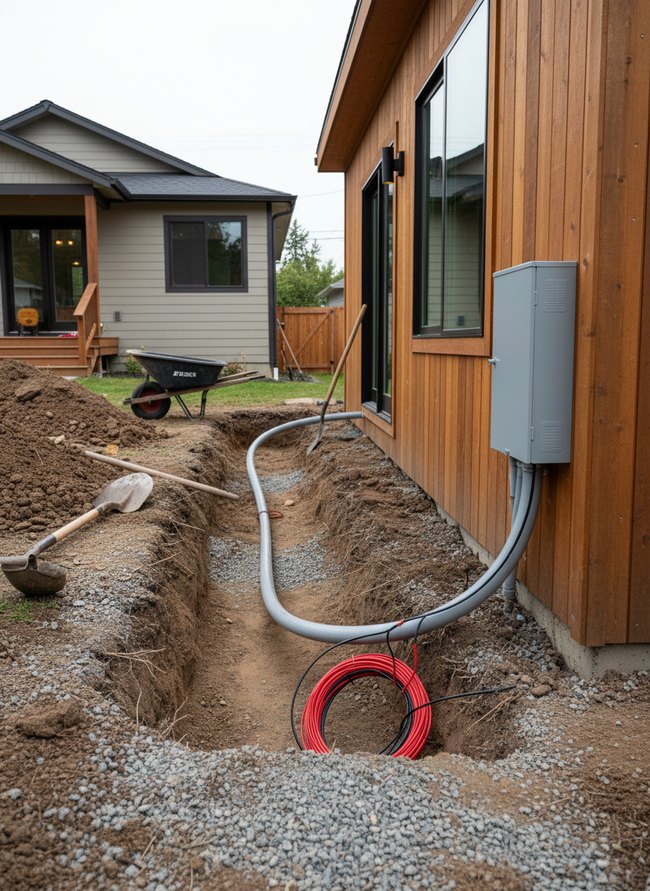
5. Trenching For Wiring
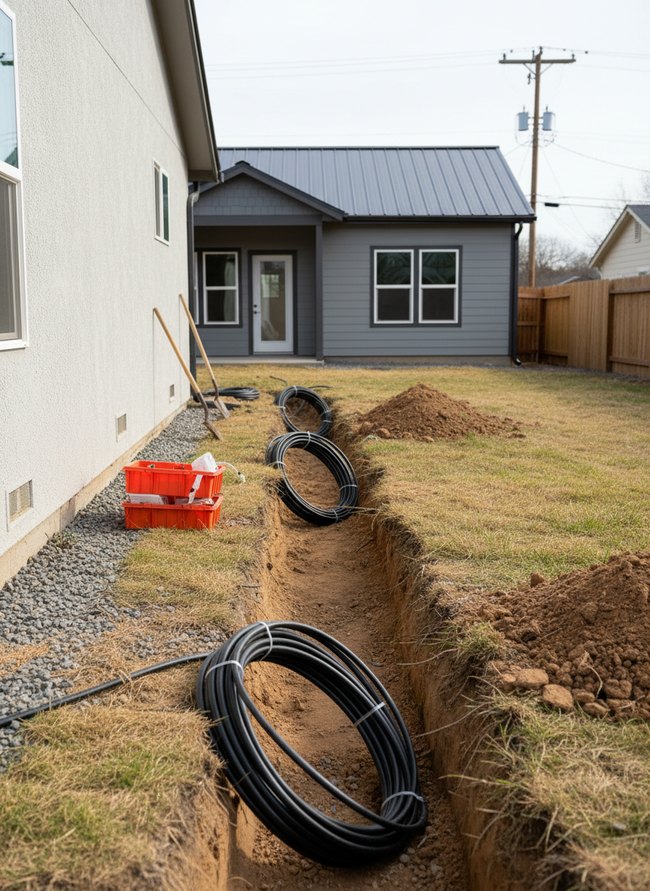
A long, deep trench cuts through the brown winter grass, ready for underground electrical cables. Black electrical conduit lines the excavation, prepared to carry ADU electricity safely between the two gray buildings. Local codes dictate the correct trench depth for wiring.
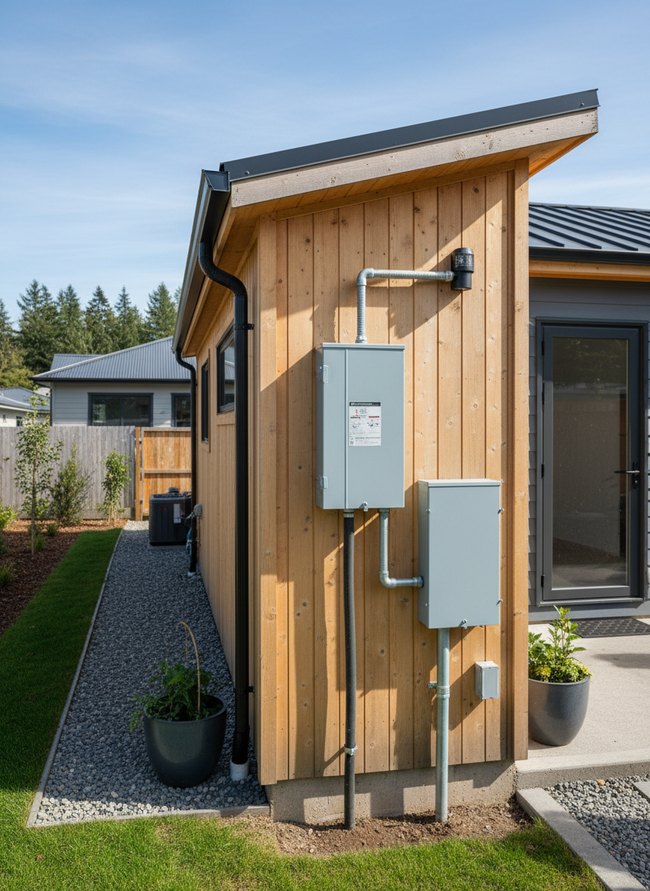
6. Weatherproof Service Entrance

A gray metal box labeled “Weatherproof Service Entrance” stands prominently against the vertical cedar siding of the ADU. The sturdy box protects the ADU’s electricity connections from outdoor elements like rain and dust. Always choose outdoor-rated electrical components for any exterior wiring.
7. Ground Rod Installation
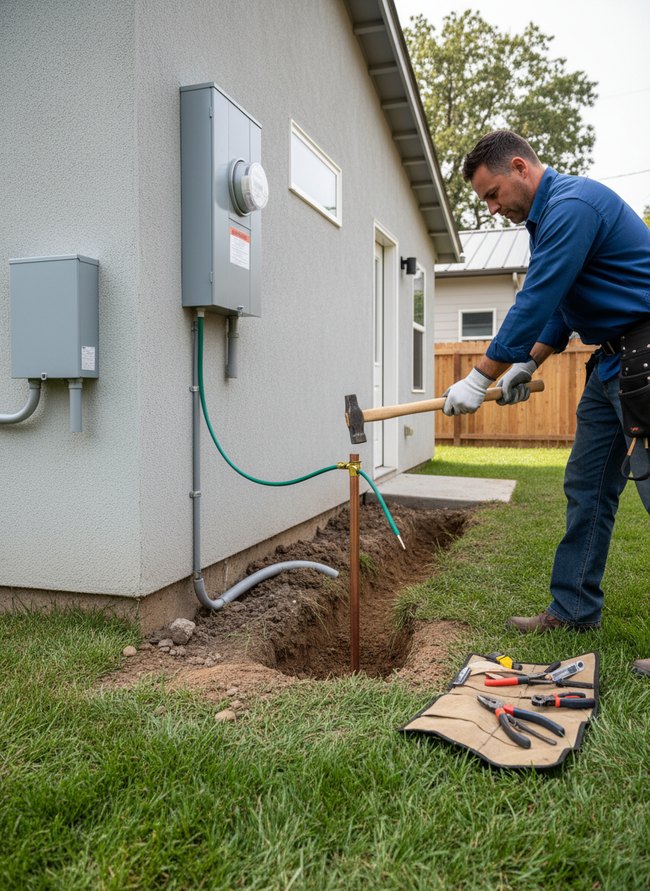
A copper ground rod is hammered into the brown earth next to a light gray wall. Installers must drive the rod deeply enough to provide a safe path for ADU electricity. Local codes must allow for the chosen ground rod depth.
8. Meter Socket Assembly
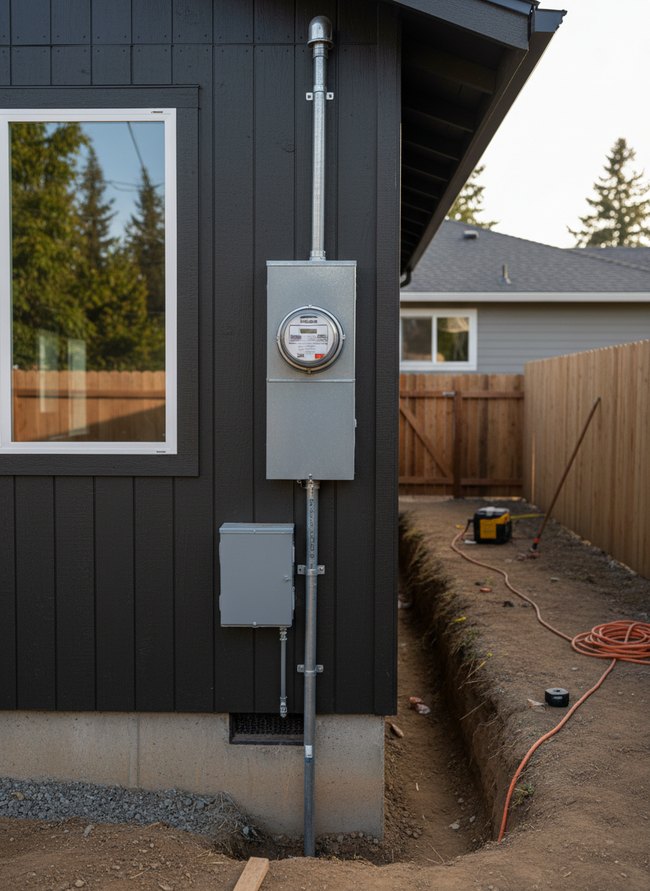
A shiny silver meter socket assembly stands out against the dark charcoal siding of the detached structure. A thick gray conduit pipe runs up the wall into the assembly, then another pipe goes down into a deep dirt trench, providing power for ADU electricity. Bury electrical conduit at the proper depth to meet local building codes.
9. Load Calculation Diagram
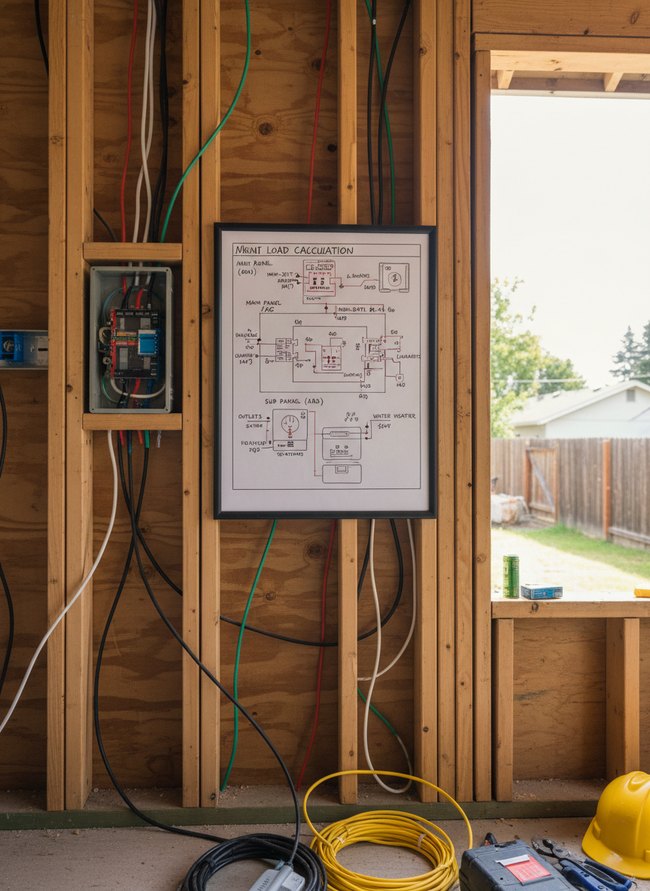
A white paper diagram, “MGMT LOAD CALCULATION,” hangs against a plywood wall with exposed wooden studs. Red, green, black, and white wires run through holes in the raw lumber framing, connecting to a silver metal electrical box. When planning ADU electricity, always create a clear load calculation diagram to avoid overloading circuits.
10. Conduit Bending Techniques
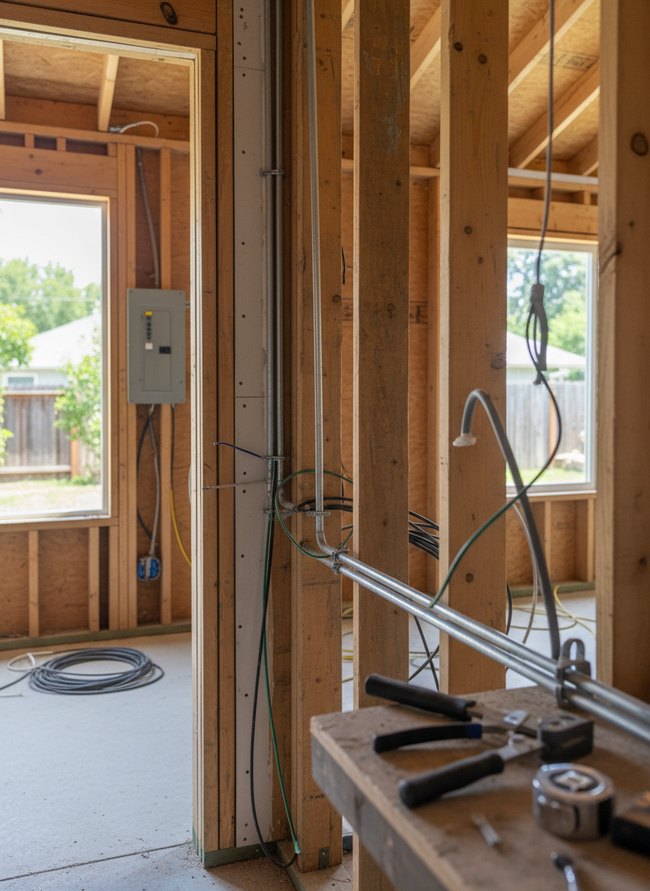
Silver metal conduit tubing shows carefully bent curves around a light wooden stud. Expert conduit bending helps you run ADU electricity safely through tight spaces in your accessory dwelling unit. Always plan bends to avoid sharp angles that could damage interior wiring.
11. Junction Box Placement
Two gray metal junction boxes stand out against the warm honey-toned wood siding. The ADU electricity boxes require an easily accessible location. Local building codes dictate proper placement for these necessary components.
12. Wiring Schedule Blueprint
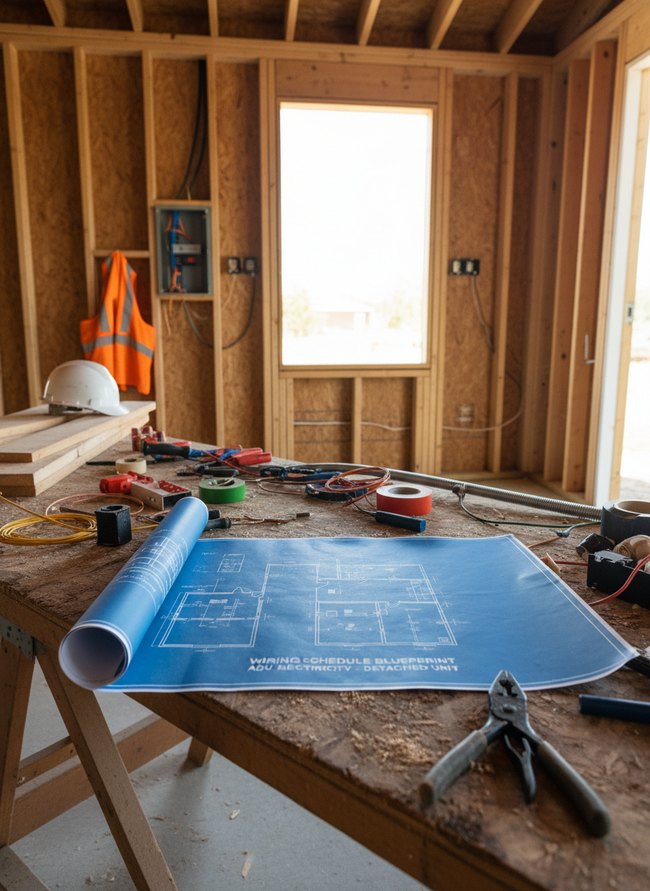
A large blue blueprint shows a detailed layout for your ADU electricity plan. The plan clearly shows the floor plan with marked outlets and switches, giving you a complete wiring schedule. Always follow local building codes for all electrical work.
Can My Existing Panel Handle It? (Before You Dig a Single Trench)
Most homeowners imagine a quick visual check of their gray metal service panel will tell them its capacity. An electrician often looks deeper, beyond the front cover. Your main breaker, a single black switch, shows its amp rating clearly stamped on the handle. Many people believe this number, like a 100-amp marking, means your house has that much power to spare. Actually, that number just tells you the maximum current the panel can safely handle before tripping. Your existing appliances, those humming refrigerators and bright ceiling lights, already draw a large portion of that available electricity.
A true capacity assessment requires a detailed load calculation, not a simple glance. People often add new circuits for a detached ADU without considering the house’s total power usage. This common mistake leads to overloaded panels and flickering lamps. A qualified electrician measures actual current draw from your current home’s electrical system, adding up all those individual circuit demands. Your specific need for a separate outdoor breaker box or a beefier service entrance cable depends entirely on this detailed calculation. A simple 200-amp panel might actually have less available capacity than a well-managed 150-amp setup.
The ‘Pretty’ Conduit Problem: Burying Cables Without Upsetting Your Landscaping Design
Many homeowners believe a long brown trench must scar their manicured lawn for new wiring. Most people dig a wide, deep ditch, ripping up green turf and colorful flower beds. Smart property owners select a shallow, narrow channel, saving their established landscape. Plastic PVC conduit, a stiff white pipe, often sits just below the soil surface. Burial depth matters for outdoor electrical lines. National Electrical Code mandates specific depths for underground electrical cable, protecting the copper wires inside. You avoid future problems following these strict guidelines. A black garden spade makes a clean, thin cut through the topsoil. Small shovels lift out only the necessary brown dirt. Consider flexible gray conduit, a corrugated plastic tube, around existing tree roots. That material bends easily, protecting ancient oak structures. Most folks buy bright orange caution tape, burying it right above the conduit. Savvy individuals install thin metal wire along the power line, allowing for easy location with a wire tracer later. A wire tracer, a small handheld tool, sends a signal down the buried cable. Future electrical work becomes simple. Green sod rolls back over the narrow trench, hiding the new electrical pathway completely. Your yard stays undisturbed and beautiful.
Which Idea Will You Try First?
That’s 12 different takes on adu electricity. The best ideas above are usually the smallest moves — one material, one layout shift, one piece of furniture in the right place. Pick whichever room feels closest to your space and start there before tackling the rest.
Found an idea worth keeping? Save this post to your Pinterest board so it’s waiting for you when you’re ready to start your own project.